Complete Orbi RBK852 Setup & Troubleshooting Guide

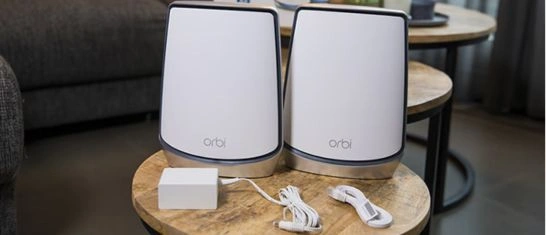
The Netgear Orbi RBK852 is a powerful mesh WiFi 6 system designed for big houses and heavy internet use. It combines one router and one satellite to cover up 5,000 square feet with dependable, high-speed wireless coverage on many floors and devices of coverage.

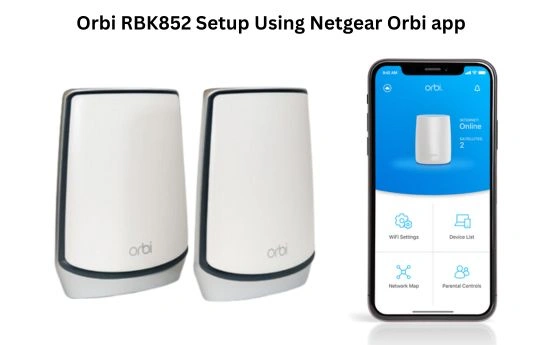
This guide gives you a clear, step-by-step help in setting up the hardware, configuring it, fixing problems, and making other changes. It also provides the steps on how to get your Orbi RBK852 system working well.

Orbi RBK852 setup: Step-By-Step Procedure

What’s inside the box?

Make sure all the components are in place for the easy setup:

  • Orbi Router (RBR850)
  • Orbi Satellite (RBS850)
  • 2 power adapters, one for each unit
  • One ethernet wire (yellow is color)
Orbi RBK852 Setup

Step-By-Step Physical Setup

Step 1: Turn on the Units

Turn both units on.

  • The Router is the one with the label RBR850
  • The Satellite is the one with the RBS850 label.

They look same but cannot be swapped in place of one another. The router controls internet traffic and connects to the modem.

Step 2: Link the modem to the router

  • Take the power and ethernet out of your modem to turn it off altogether.
  • Plug the ethernet wire that comes with it into the LAN/Internet port on your modem.
  • Plug in the other end of the yellow WAN connection on the back of the Orbi Router.
  • Make sure that your modem is turned on and wait for the lights to stop blinking before proceeding.
  • Once that is complete, connect the power adapter for the Orbi Router to a wall socket as well as the rear of the router unit.

The ring LED on top of the router will blink white. This signals that the device is starting up.

The ring will light up in pure white color when it’s ready to be set up.

Step 3: Place the Satellite

  • Find a place 2–3 rooms away from the router, preferably with an open passage (avoid too many walls or floors in the way).
  • Connect the Satellite’s power adapter to the RBS850 device and plug it in.
  • The LED on the top ring will pulse white to show that it’s turning on.
  • It will attempt to connect to the router on its own after two minutes.

Look at the color of the LED:

  • Blue implies a solid relationship
  • Amber signifies a reasonable connection (now you can move it a little closer)
  • Magenta indicates no connection (resync or move).

If the indicator remains magenta for more than two minutes, press the router and satellite Sync buttons within two minutes.

Step 4: Let Them Sync

  • The satellite LED ring should turn off entirely after the communication is established.
  • Orbi RBK852 Setup is done physically. The next step is to conclude the Orbi RBK852 setup using either an app or a web browser.

Some Helpful Tips

  • Don’t put the router or satellite in a cabinet or behind a strong wall. Make sure the devices don’t lose connection.
  • Don’t put them near microwaves or cordless phone bases since they affect the WiFi signals.
  • If your home has more than one floors, consider putting the satellite one floor up or down, but not immediately above it.
  • And if you want the best connection? Connect the satellite directly to the router using an ethernet connection. If you can achieve this, it’s a game-changer. It’s called a wired backhaul.

Ways to Set Up

1. Setting up via Netgear Orbi app

  • Get the Orbi app from the Apple App Store or Google Play.
  • Make a Netgear account or log in to the existing one. After clicking “Set up an Orbi”, scan the router’s QR code.
  • Now fill in the credentials asked (username & password). The details are provided on the device’s label.
  • Once you’re able to perform Orbi login successfully, this dashboard allows you to change your WiFi name, password, and admin credentials. Now, follow the on-screen instructions.
  • Connect the satellite and let it sync automatically. The LED will pulse white and change color. Then, follow the instructions in the app to finish pairing.
Setting up via Netgear Orbi app

2. Setting Up Your Web Browser Manually

  • Use an Ethernet or WiFi to connect your device to the router.
  • Now open any browser, go to orbilogin.net or 192.168.1.1
  • Fill in the details and log in using your admin and password (The details are provided on router’s label)
  • The Setup Wizard often detects your ISP connection directly. Set the SSID, password, admin login, select among IPv4/IPv6, and PPPoE if needed.
  • After setting up the router, connect the satellite. It syncs automatically. You can check its condition and upgrade its firmware using the web interface, whenever required.

3. Placing the devices appropriately and syncing them

  • Router: Use the 2.5 Gbps WAN port to connect to your modem.
  • Satellite: Put it within range (3–4 rooms away). The white pulse LED shows that sync has started.
  • You can check the connection by looking at LED colors that indicate the quality of the backhaul, where:
  • Blue indicated a nice & strong connection
  • Amber means fair.
  • Magenta means no connection has been established yet
  • Off means the device is working and synchronized

Additional Configuration Settings

Network Basics (App/Web)

  • Change the names and passwords for WiFi, the Orbi login, and set up a guest network.
  • Choose between new and static/Pri-over-ethernet choices.
  • Turn on QoS, UPnP, VLAN, port forwarding, and traffic meter on the web UI.
  • For ISP speeds that will last, choose a 2.5 Gbps WAN. If you can, couple it with ethernet backhaul.

Parental Controls and Security

  • NETGEAR Armor (membership needed for antivirus and threat protection).
  • Circle parental settings to block certain types of material and interrupt WiFi schedules.

More Features

  • You may switch on the VPN service, set up OpenVPN profiles, or disable the client VPN.
  • For gaming, smart homes, and security cameras, port forwarding and VLAN tagging.
  • Managing firmware: automatically or by hand using the web or app.

How to Fix Problems?

Here are some things you can do if your mesh system faces any issue:

1. Router and satellite won’t sync?

  • Turn off and on both devices.
  • Get the satellite closer. Try to sync again

2. Not able to find the internet

  • Use the Setup Wizard in the web UI.
  • Check the type of IP (DHCP or PPPoE).
  • ISP restricted to PC MAC? Use MAC cloning.

3. WiFi that isn’t strong or speeds that aren’t fast

  • Move the satellite till the LED light becomes blue or amber (this displays the quality of the backhaul).
  • If you can, switch to Ethernet backhaul.
  • Use the app’s speed test and device manager to find hogs.

4. Problems with firmware

  • Always keep both the router and the satellites up to date.
  • If the Netgear Orbi app update doesn’t work, use the web UI.

Additional Tips

  • Want to restart the computer? You may do it from a distance using the app—no need to disconnect.
  • Learn how to read LED indications for rapid troubleshooting.
  • Do you like Ethernet backhaul better? Plug both ends in, and the system will switch on its own.
  • Use the web UI to block VPN or streaming for certain users.
  • Keep the firmware up to date so that new features like VLAN support other Circle enhancements may be implemented.

FAQs

That signifies "no connection." You may try turning it off and on again, moving it closer, or resetting and resyncing it. You may have to factory reset if the firmware is broken.

To revert the router back to its factory settings, turn it on and hold down the reset button for around 7 seconds. Then start again and set it up.

Disclaimer: We hereby disclaim ownership of any product and any association, affiliation or representation in any form, of any brand, product or service. All the information provided here has been drafted by a team of highly qualified technical experts and regularly undergo reviews and updates.